一.简介
ButterKnife 是 jake Wharton 的一个用于 View 注解框架,目前已经有 22000+ star , ButterKnife 的用处就是为开发者减少类似于 findViewById, setOnClickListener 等重复的代码,取代之的是通过注解对代码进行标记,让编译器自动生成需要的代码。
那么 ButterKnife 究竟怎么实现的呢?简单地说就是使用了注解,通常我们对注解的处理,又两种方式,一是通过反射处理注解,一种是通过注解处理器,而 ButterKnife 就是通过注解处理器实现对注解的处理,但是在整个框架的其他地方中还是有使用到反射的。
二.反射
1.反射的由来
java 对象在运行的时候有时因为多态的原因会产生两种类型 :
- 编译时类型
- 运行时类型
比如对于 Person p = new Student,它的编译的时类型就是 Person,而运行时类型就是 Student。对于编译时类型在编译前就可以确定,而对于运行时类型,因为只有在运行的时候才能确定,所以有时不能直接通过对象进行访问。但是有时程序需要调用的是对象在运行时的类型方法,那有该怎么办呢?
解决方式有两种:
- 在编译时和运行的都完全知道类型的具体信息,使用 instanceof 进行,再进行类型转换。
- 无法知道该对象属于哪些类,程序只能依靠运行时信息确定,就必须使用反射。
2.反射的使用
反射就是根据一些类的信息确定一个对象属于哪个类还可以因此生成一个该类的对象。首先就是获取一个类的 Class 对象,每一个类都有一个 Class 对象,保存着这个类的信息。
(1)获取 Class 对象
- Class forName(”全限定类名”)。
- 通过某个类的 Class 属性,获得该类对应的 Class 对象。比如 String.class
- 调用某个对象的 getClass 方法。
- 通过类加载器,Class.loadClass(className)
(2)从Class 中获取信息
- getConstructor 等,获取构造器
- getMethod 等,获取 Class 对应类的方法
- getField 等,获取类的成员变量
- getAnnotation 等,获取 class 上的 Annotation 就是注解信息。
- 等等
(3)通过反射生成并操作一个对象
1.创建一个对象
- Class newInstance,要求有对应类有默认构造器
- 获得制定的构造器,再调用构造器的 newInstance ,这种方式可以可以选择使用指定的构造器器创建实例。
2.调用方法
每个 Method 有一个 invoke (Object ,Object…)方法,Object 是方法的主调就是方法的调用对象,Object… 是方法的参数
3.访问成员变量
通过 getFields/getField 可以对成员变量进行访问,set/get 方法。
在访问成员变量和调用方法的时候需要对他们的访问权限做一些处理,setAccessible(boolean flag) :
- true,指示在使用方法或者成员变量的时候取消 java 的 访问权限检查。
- false,指示 Method 在使用的时候 实施 java 的访问权限检查。
三.注解 Annotation
注解就是对部分代码进行标记,然后可以在编译,类加载,运行的时候被读取,并执行相应的处理, 从而对源文件补充一些信息。
1.基本的 Annotation
- @Override ,指定一个方法必须重写父类的方法,就是告诉编译器,检查这个方法,保证父类有一个父类重写的方法,否则编译就出错。
- @Deprecated,标记过时的方法等
- @SupperssWarnings,指示被修饰的程序元素,取消显示指定的编译器警告,要在括号内使用 name = value ,为该 Annotation 的成员变量设置值。
- 等等
2.自定义的 Annotation
定义一个 Annotation 与接口类似,不过使用的是 @interface 而不是 interface 。一个 Annotation,可以带成员变量 且以无形参的方法来声明,其方法和返回值定义了成员变量的名字和类型。也可以设置默认值 default .
自定义的 Annotation 可以分为两类:
- 包含成员变量,可以接受更多的元数据,也称为元数据 Annotation。
- 没有成员包含成员变量,成为标记的 Annotation 。
2.元 Annotation
元 Annotation 就是对注解进行注解,换句话说就是对自定义的注解补充一些信息。
1.@Retention
只能用于修饰 Annotation 定义,也就是在自定义一个注解的时候修饰在 @interface 上方。Retention 指定被修饰的 Annotation 可以保留多长的时间,具体策略需要 指定 value 成员变量,有三种可选的时间长度策略。
- RetentionPolicy.Class 记录在 class 文件中,即运行时,在 JVM 不可获取 Annotation。
- RetentionPolicy.Runtime 可以在 运行的时候也获得,程序可以通过反射的获取该 Annotation。
- RetentionPolicy.SOURCE 只保留在源代码中,编译的时候就直接丢弃。
2.@Target
用于指定修饰的 Annotation 能用于修饰哪些程序元素,包含一个 value 变量,同样只能修饰一个 Annotation 定义。具体有以下策略
- ElementType.ANNOTATION_TYPE,指定定义的 Annotation 只能修饰 Annotation。
- ElementType.CONSTRUCTOR
指定定义的 Annotation 只能修饰构造器 - ElementType.FIELD
指定定义的 Annotation 只能修饰 成员变量 - ElementType.LOCAL_VARIABLE
指定定义的 Annotation 只能修饰 局部变量 - ElementType.METHOD
指定修饰的 Annotation 只能修饰方法定义 - ElementType.PACKAGE
指定修饰的 Annotation 只能修饰包定义 - ElementType.Type
指定修饰的 Annotation 可以修饰类接口或者枚举定义
3.@Inherited
指定修饰的 Annotation 具有继承性,则继承的类都具有默认定义的 Annotation。
3.提取 Annotation
只有 使用 @Retention(RetentionPolicy.RUNTIME )修饰,JVM 才会在 装载 class 的时候提取 Annotation ,因为注解可以修饰类,方法等,因此注解提取的信息是一个 AnnotationElement,这是所有程序元素的(class , Method , Constructor ) 的父接口。也可以通过 getAnnotation 等直接提取出 Annotation 信息。
4.编译时注解 Annotation
前面说过注解信息的提取实在 JVM 装载 class 的时候提取的,因此 @Retention 的 参数就设置为 RetentionPolicy.RUNTIME ,但是这多少对 JVM 的性能有所消耗,那有什么优化的方法吗?答案就是使用 编译时处理 Annotation 技术,Annotation Processing Tool 简称 APT。 APT 的原理就是通过继承 继承 AbstractProcessor 类实现一个 APT 工具,并装在到编译类库中,编译的时候就会使用 APT 工具处理 Annotation, 可以根据源文件中的 Annotation 生成额外的源文件和其他文件,APT 还会编译生成的代码文件和原来的源文件将他们一起生成 class 文件,这些附属文件的内容也都与源代码的相关。而对注解的信息的处理通常就放在生成的文件中,在运行时就不用再提取,直接关联并执行处理即可。
三.ButterKnife
下面以 findViewById 和 setOnClickListener 对应的 @BindView 和 @ OnClick 为例简单介绍 ButterKnife 宏观实现。
1.定义注解
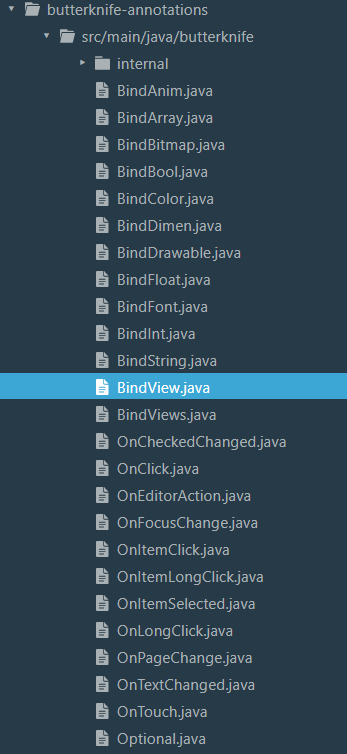
在 ButterKnife 源码中 butterknife-annotations 库主要用来存放自定义注解。可注解的类型如图所示:
@BindView 的注解:1
2
3
4
5
6
7
8
9
10
11
12/**
* Bind a field to the view for the specified ID. The view will automatically be cast to the field
* type.
* <pre><code>
* {@literal @}BindView(R.id.title) TextView title;
* </code></pre>
*/
@Retention(RUNTIME) @Target(FIELD)
public @interface BindView {
/** View ID to which the field will be bound. */
@IdRes int value();
}
BindView 有两个注解修饰,从前面的关于注解的知识就可以知道 @Retention(RUNTIME) 表示在保留注解信息到运行的时候, @Target(FIELD) 表示这个注解只能修饰成员变量。
@OnClick 的注解1
2
3
4
5
6
7
8
9
10
11
12
13
14
15
16
17
18
19
20
21
22
23
24
25
26
27
28/**
* Bind a method to an {@link OnClickListener OnClickListener} on the view for each ID specified.
* <pre><code>
* {@literal @}OnClick(R.id.example) void onClick() {
* Toast.makeText(this, "Clicked!", Toast.LENGTH_SHORT).show();
* }
* </code></pre>
* Any number of parameters from
* {@link OnClickListener#onClick(android.view.View) onClick} may be used on the
* method.
*
* @see OnClickListener
*/
@Target(METHOD)
@Retention(RUNTIME)
@ListenerClass(
targetType = "android.view.View",
setter = "setOnClickListener",
type = "butterknife.internal.DebouncingOnClickListener",
method = @ListenerMethod(
name = "doClick",
parameters = "android.view.View"
)
)
public @interface OnClick {
/** View IDs to which the method will be bound. */
@IdRes int[] value() default { View.NO_ID };
}
BindView 有三个注解修饰, @Retention(RUNTIME) 表示在保留注解信息到运行的时候, @Target(METHOD) 表示这个注解只能方法,@ListenerClass 就是对方法进一步描述,比如调用者类型 targetType,调用方法 setter,方法监听 type,最后执行的方法和方法参数 name ,parameters。
2.注解处理器
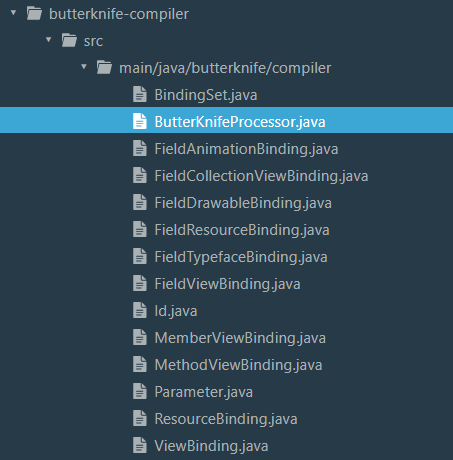
ButterKnifeProcessor 注解处理器是 APT 中对注解处理的关键类,在 ButterKnife 中注解处理器位于 butterknife - compiler 包中。
ButterKnifeProcessor 继承自 AbstractProcessor ,而 AbstractProcessor 实现了 Processor 接口,这个接口主要有两个重要的方法。
1 | public interface Processor { |
init 方法 :
1 | @Override public synchronized void init(ProcessingEnvironment env) { |
这个方法主要的作用是:
- 获取java SDK 的版本
- 获取 ElementUtils,用于处理 Element ,Element 就是 Java 中的包,类等元素。
- 获取 TypeUtils,用于处理 javaType,Type 就是 java 的类型元素,比如有原始类型(普通的类型),参数化类型(比如List
),数组类型,原生类型(int ,long) 等。 - 获取 Filer ,用于最后生成相关的文件。
process 方法:
1 | @Override public boolean process(Set<? extends TypeElement> elements, RoundEnvironment env) { |
在 brewJava 方法中 有如下代码:
1 | static Builder newBuilder(TypeElement enclosingElement) { |
对于 process 方法,主要做了如下几件事:
- 调用 findAndParseTargets ,扫描所有的 ButterKnife 注解。
- 调用 brewJava 生成 JavaFile。
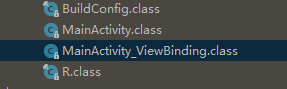
- 最后生成一个 对应的 class 文件。这个class 文件名可以在 brewJava 的方法中可以看到,对应着 bindingClassName ,所以最后生成的 class 名字就为 xxxx_ViewBinding.
为了验证,在 MainActicity 中使用 ButterKnife 注解,然后运行一下,最后可以在 build-intermediates-classes 下找到对应的 MainActivity_ViewBinding。
2.绑定 bind 方法
在经过前面两个步骤后,对于 ButterKnife 的使用也就是一句 bind 方法。
1 | @Override |
直接看 bing 方法的具体实现
1 | @NonNull @UiThread |
对于 bind 方法,首先就是获取 目前 Window 的一个 根视图 DecorView ,这里可以比较一下 findViewById 的实现中有这么一段
1 | public static AppCompatDelegate create(Activity activity, AppCompatCallback callback) { |
通过比较就可以看出,对于注解来说最后的实现还是一样的。下面接着看 createBinding
1 | private static Unbinder createBinding(@NonNull Object target, @NonNull View source) { |
在这里 会先去获取一个对象的构造器 ,然后调用这个构造器去实例化一个对象 。获取构造器的方法对应着 findBindingConstructorForClass1
2
3
4
5
6
7
8
9
10
11
12
13
14private static Constructor<? extends Unbinder> findBindingConstructorForClass(Class<?> cls) {
Constructor<? extends Unbinder> bindingCtor = BINDINGS.get(cls);
String clsName = cls.getName();
try {
Class<?> bindingClass = Class.forName(clsName + "_ViewBinding");
bindingCtor = (Constructor<? extends Unbinder>) bindingClass.getConstructor(cls, View.class);
...
BINDINGS.put(cls, bindingCtor);
return bindingCtor;
}
}
在这个方法中,可以看到这个构造器的类就是以 ++clsName + “_ViewBinding”++,为名字的,以 MainActivity 为例就是对应着前面的 MainActivity_ViewBinding 。
最后是通过构造器的 newInstance(target, source) 方法创建了一个对象,并将 Context 对象(target) 和 DecorView (source) 传过去。
以 @BindView 和 @OnClick 为例,最后看生成的 MainActivity_ViewBinding 类。1
2
3
4
5
6
7
8
9
10
11
12
13
14
15
16
17
18
19
20
21
22
23
24
25
26
27
28
29
30
31
32public class MainActivity_ViewBinding<T extends MainActivity> implements Unbinder {
protected T target;
private View view2131165218;
@UiThread
public MainActivity_ViewBinding(final T target, View source) {
this.target = target;
View view = Utils.findRequiredView(source, 2131165218, "field 'mButtonOne' and method 'click'");
target.mButtonOne = (Button)Utils.castView(view, 2131165218, "field 'mButtonOne'", Button.class);
this.view2131165218 = view;
view.setOnClickListener(new DebouncingOnClickListener() {
public void doClick(View p0) {
target.click();
}
});
target.mButtonTwo = (Button)Utils.findRequiredViewAsType(source, 2131165219, "field 'mButtonTwo'", Button.class);
}
@CallSuper
public void unbind() {
T target = this.target;
if(target == null) {
throw new IllegalStateException("Bindings already cleared.");
} else {
target.mButtonOne = null;
target.mButtonTwo = null;
this.view2131165218.setOnClickListener((OnClickListener)null);
this.view2131165218 = null;
this.target = null;
}
}
}
到这里就很清楚了,所有的 findViewById 和 setOnClickListener 等操作最后都是在这里实现了。 所有的参数都是从构造器里传进来的,进行绑定。
ButterKnife 实现的大致流程:
- 自定义注解
- 实现注解处理器
- 使用注解进行标记,在编译的时候通过注解处理器生成对应的 xx_ViewBinding 类
- 运行的时候,调用 bind 进行绑定,通过反射获取 对应的 xx_ViewBind 类的构造器,将 Context 对象和 DecorView 传递。
- 在 xx_ViewBinding 实现类似于 findViewId 或者 setOnClickListener 等方法。
总的来说,ButterKnife 在注解的处理上使用的是 注解处理器,在编译的时候将注解处理好,从而减少运行的时候对虚拟机性能的消耗。
最后
为了更好地理解整个过程,通过学习
Android 进阶 教你打造 Android 中的 IOC 框架
用反射和编译时注解连两种不同的方式简单的实现了相同的效果。